So here's the deal, ladies and gents. If you've ever thought about spicing up your look with some flower easy nail art, you're in for a treat. This isn't just about slapping some flowers on your nails; it's about turning your fingers into a canvas of creativity. Nail art has been around for ages, but adding flowers? That's where the magic happens. You can go from basic to bougie in no time flat.
You might be wondering why flower nail art is so popular right now. Well, it's like the perfect mix of nature and fashion. Flowers have this way of making everything feel lighter, brighter, and way more fun. And the best part? You don't have to be a professional artist to pull it off. Yep, you read that right. This is easy nail art, meaning anyone can do it. No excuses!
Let's dive deeper into why flower easy nail art is worth your time and effort. Whether you're a seasoned nail art enthusiast or someone who’s just dipping their toes into the world of DIY beauty, this trend is for everyone. Ready to learn more? Stick around because we’re about to break it all down for you.
Why Choose Flower Easy Nail Art?
First things first, let’s talk about why flower easy nail art is such a big deal. If you're someone who loves experimenting with beauty trends but doesn't want to spend hours perfecting every detail, this is your go-to option. Flower designs on nails are not only visually appealing but also super versatile. You can go for tiny daisies, bold roses, or even abstract floral patterns. The possibilities are endless!
Plus, flowers have this universal appeal that makes them suitable for any occasion. Whether you're heading to a casual brunch or dressing up for a formal event, flower nail art can elevate your look effortlessly. It's like wearing a bouquet on your hands—minus the wilting, of course. And hey, who doesn’t love feeling fresh and fabulous all day long?
Benefits of Doing Flower Nail Art Yourself
Now, let’s get real for a sec. Doing your own flower easy nail art comes with a bunch of benefits. For starters, it saves you a ton of cash. Salon visits can add up quickly, and sometimes you just want to switch things up without breaking the bank. Plus, doing it yourself means you have complete control over the design. No more "but I thought you said this color" moments with your nail tech.
Another perk? It's a great way to unwind and express your creativity. Think of it as a mini art therapy session. Grab your favorite polish, put on some tunes, and let your inner artist shine. You might even discover a hidden talent along the way. And if it doesn't turn out perfect the first time? No biggie. That's the beauty of DIY—you can always start over.
Step-by-Step Guide to Flower Easy Nail Art
Alright, now that we’ve convinced you to give flower easy nail art a try, let’s walk you through the process step by step. Don't worry; we’re keeping it simple so even beginners can follow along.
1. Gather Your Supplies
Before you start painting, make sure you have everything you need. Here's a quick list:
- Nail polish in your base color
- Nail polish in your flower color(s)
- A fine-tipped brush or dotting tool
- Top coat for a glossy finish
- Nail polish remover (just in case)
2. Prep Your Nails
Start by cleaning your nails and applying a base coat. This will help your polish last longer and prevent staining. Once your base coat is dry, apply your chosen base color. Two thin coats usually work best.
3. Sketch Your Flowers
Using your fine-tipped brush or dotting tool, start sketching your flowers. Begin with the center, then add petals around it. Don't stress about making it perfect—imperfection adds charm. Keep going until you've filled your nails with beautiful blooms.
4. Add the Finishing Touches
Once your flowers are done, let them dry completely. Then, apply a top coat to seal everything in place. This will give your nails a shiny, professional look and protect your design from chipping.
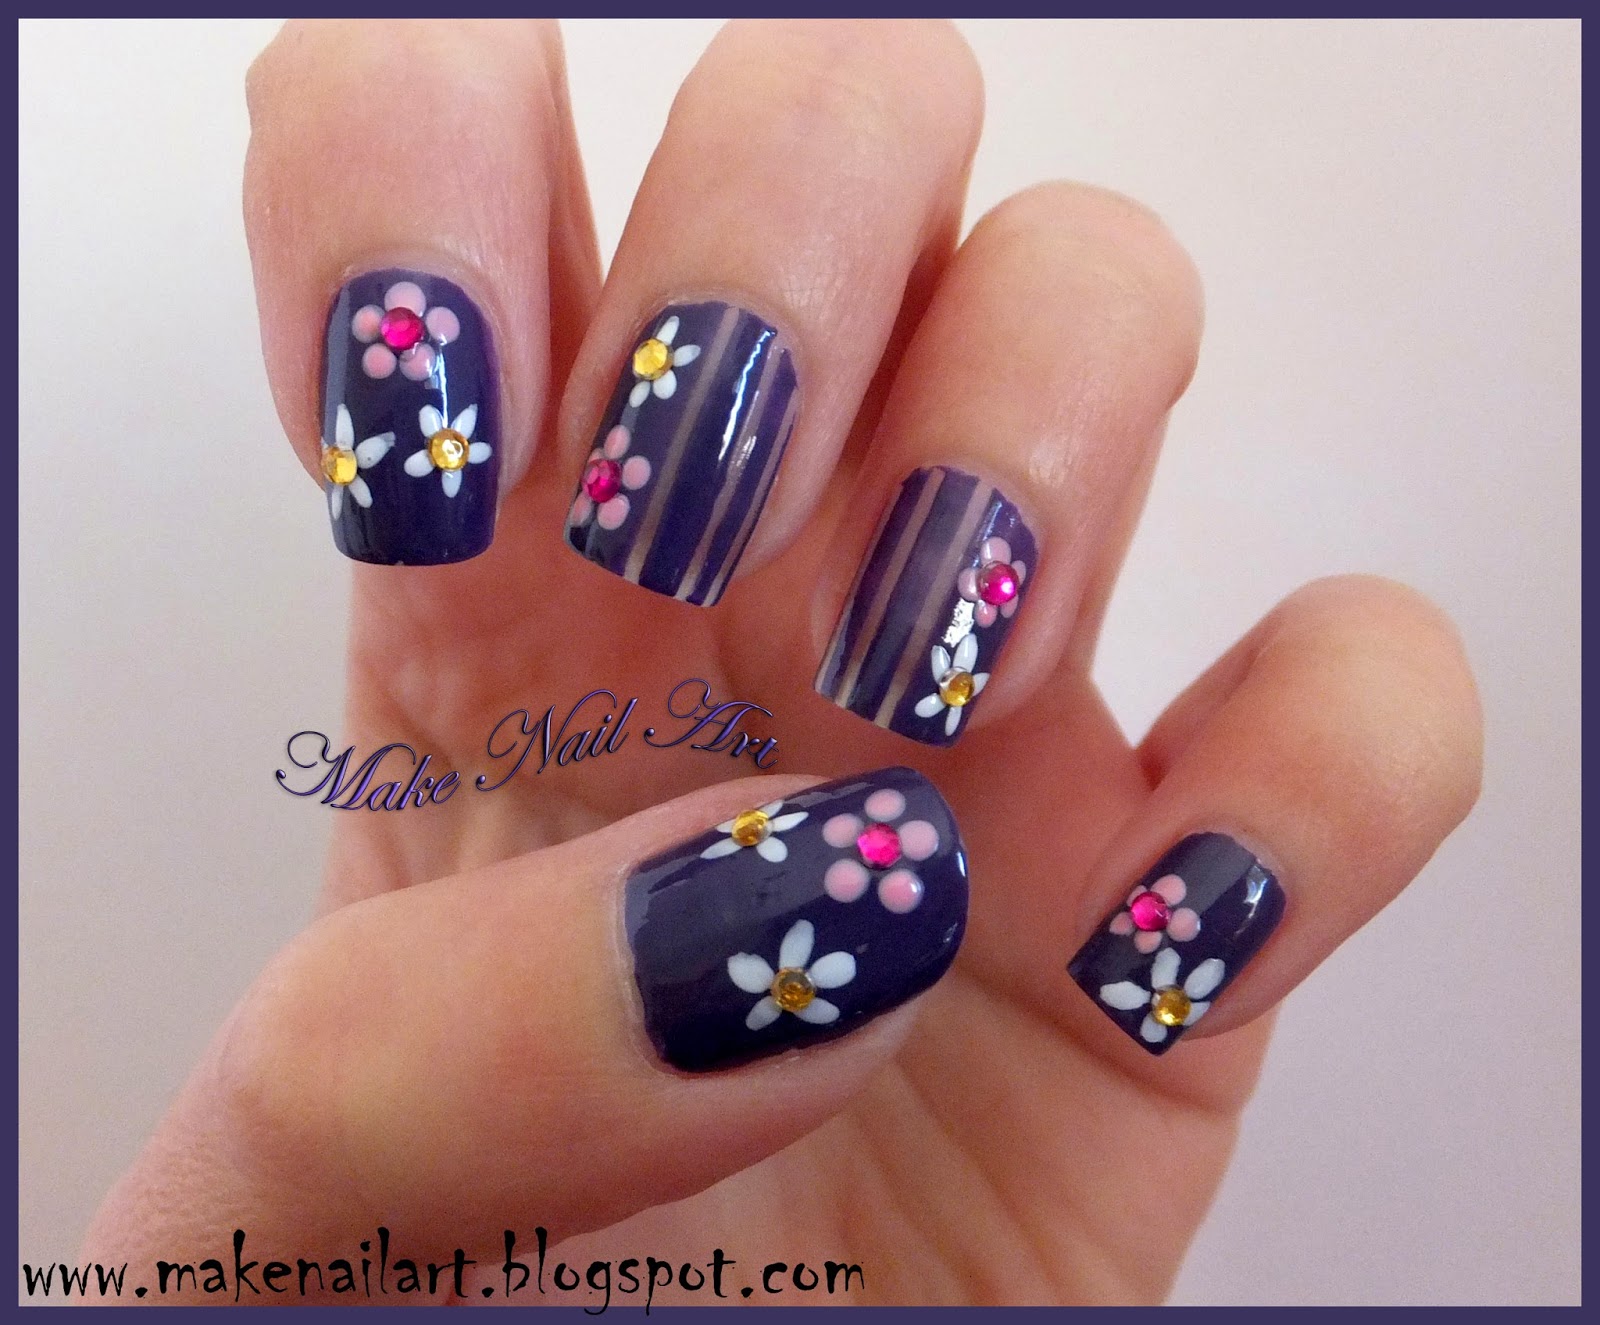
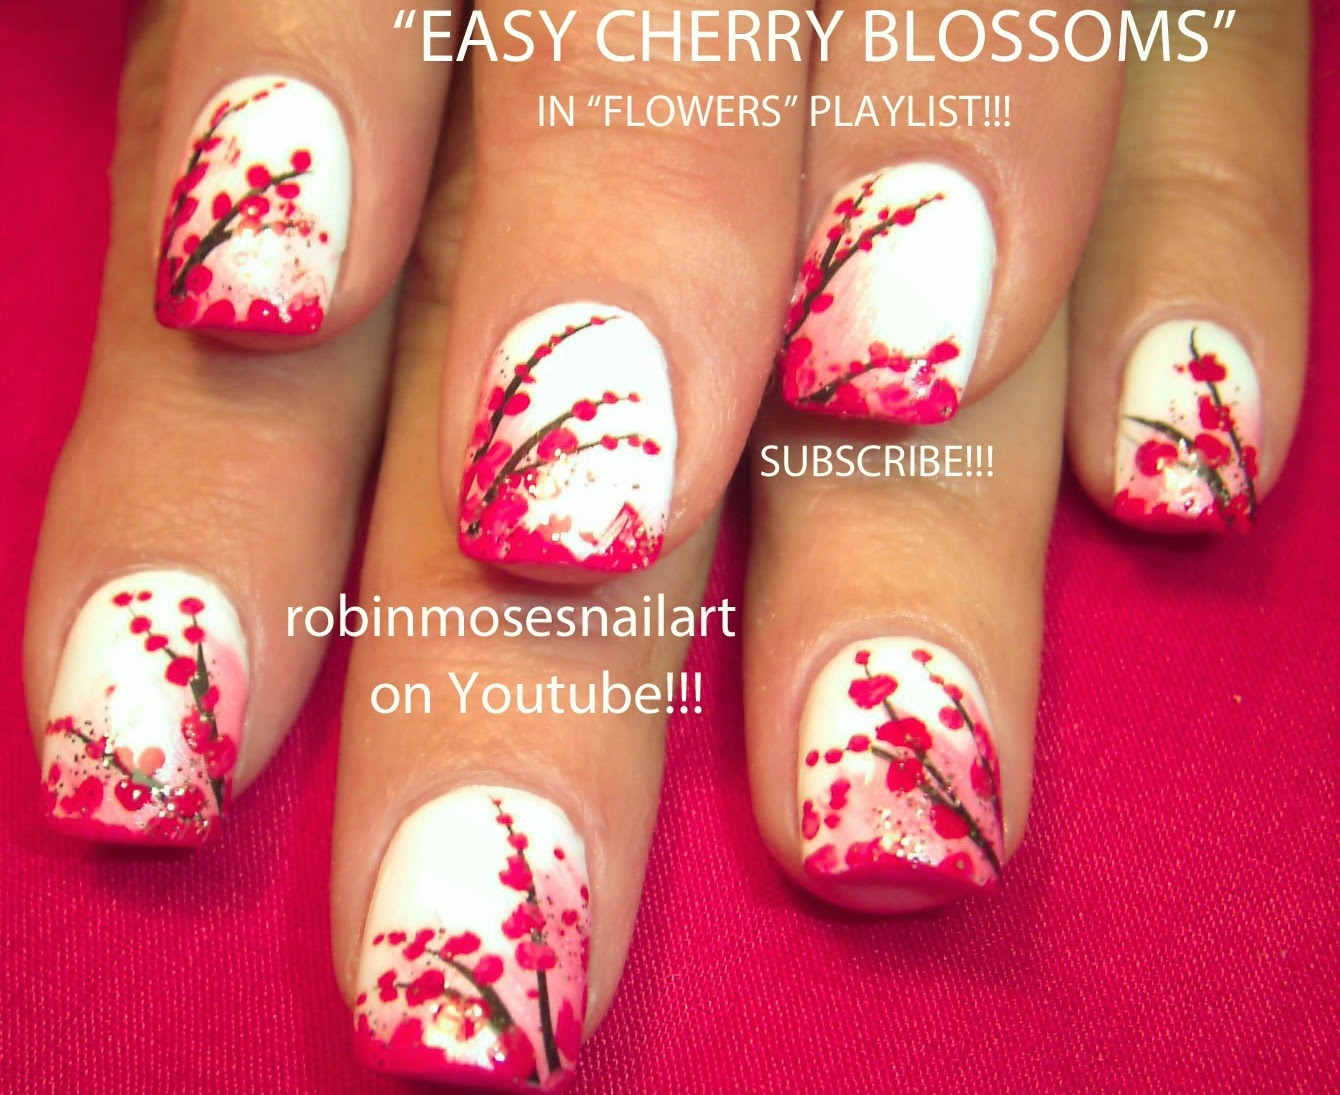
Popular Flower Designs for Nail Art
When it comes to flower easy nail art, the options are endless. Here are some popular designs you might want to try:
- Daisies: Perfect for a cheerful, summery vibe.
- Roses: Great for adding a touch of elegance.
- Cherry Blossoms: Ideal for a delicate, romantic look.
- Abstract Florals: If you're feeling bold, go for something abstract and unique.
Each design has its own charm, so pick one that matches your personality and mood. And remember, there's no right or wrong way to do it. Experiment until you find what works best for you.
Tips for Perfecting Your Flower Nail Art
Here are a few tips to help you perfect your flower easy nail art:
- Practice on a piece of paper before painting your nails. This will help you get a feel for the brush or dotting tool.
- Work in a well-lit area so you can see what you're doing. Natural light is always best.
- Take your time. Rushing can lead to mistakes, so slow down and enjoy the process.
- Don't be afraid to mix and match colors. Sometimes the most unexpected combinations turn out to be the best.
By following these tips, you'll be well on your way to creating stunning flower nail art that'll have everyone asking for your secret.
Common Mistakes to Avoid
While flower easy nail art is relatively simple, there are a few common mistakes you should avoid:
- Using Too Much Polish: This can lead to smudging and uneven application. Start with a small amount and build up as needed.
- Rushing the Drying Process: Patience is key. Let each layer dry completely before moving on to the next.
- Overcomplicating the Design: Sometimes less is more. Stick to a simple design if you're new to nail art.
By being mindful of these mistakes, you can ensure your flower nail art turns out looking flawless every time.
Tools and Products You Need
Having the right tools and products can make all the difference when it comes to flower easy nail art. Here are some recommendations:
- Nail Polish: Look for high-quality polish that dries quickly and doesn't smudge easily.
- Brushes: A fine-tipped brush is essential for creating detailed designs. Dotting tools are also great for making circles.
- Top Coat: Invest in a good top coat to protect your design and give it a glossy finish.
These tools will help you achieve professional-looking results without the professional price tag.
How to Maintain Your Flower Nail Art
Once you've created your masterpiece, you'll want to keep it looking fresh for as long as possible. Here are some tips for maintaining your flower easy nail art:
- Apply a fresh layer of top coat every few days to prevent chipping.
- Wear gloves when doing household chores to protect your nails from harsh chemicals.
- Moisturize your hands regularly to keep your nails hydrated and healthy.
By taking good care of your nails, you can enjoy your flower nail art for weeks instead of days.
Flower Nail Art Inspiration
Need a little inspiration? Check out these amazing flower nail art ideas:
1. Minimalist Florals
Simple yet stunning, minimalist florals are perfect for everyday wear. Think delicate lines and soft colors.
2. Bold Florals
If you're feeling adventurous, go for bold and bright floral designs. These are sure to make a statement.
3. Watercolor Florals
Watercolor effects add a dreamy, ethereal quality to your flower nail art. It's like painting on your nails!
These ideas are just the beginning. Let your imagination run wild and create something truly unique.
Conclusion: Embrace Your Inner Artist
There you have it, folks. Flower easy nail art is not only a fun and creative way to enhance your style, but it's also accessible to everyone. Whether you're a seasoned pro or a complete beginner, there's something here for you. So why not give it a try? Grab your supplies, roll up your sleeves, and let your inner artist shine.
We’d love to hear about your experience with flower nail art. Did you try any of the designs we mentioned? Do you have any tips or tricks to share? Let us know in the comments below. And don’t forget to share this article with your friends who might be interested in giving flower easy nail art a shot. Happy painting!
Table of Contents
- Why Choose Flower Easy Nail Art?
- Benefits of Doing Flower Nail Art Yourself
- Step-by-Step Guide to Flower Easy Nail Art
- Popular Flower Designs for Nail Art
- Tips for Perfecting Your Flower Nail Art
- Common Mistakes to Avoid
- Tools and Products You Need
- How to Maintain Your Flower Nail Art
- Flower Nail Art Inspiration
- Conclusion: Embrace Your Inner Artist