Hey there, nail art enthusiasts! Are you ready to dive into the world of easy flower nail art? If you're looking for a way to add a touch of elegance and creativity to your nails, you're in the right place. Flower nail designs are not only beautiful but also super simple to create, even if you're a complete beginner. So, grab your favorite nail polish, and let's get started!
Flower nail art is one of the most popular trends in the beauty world, and for good reason. It brings a fresh, vibrant look to your nails that can suit any occasion. Whether you're attending a summer picnic, a formal event, or just want to brighten up your day, this design is perfect. The best part? You don’t need to be a professional to achieve stunning results.
Before we jump into the details, let’s talk about why easy flower nail art is a game-changer. It’s not just about painting flowers; it’s about expressing your creativity and personal style. With a few basic tools and some practice, you’ll be creating designs that will make everyone ask, "Did you go to a salon?" Spoiler alert: You didn’t!
Why Easy Flower Nail Art is Trending
Flower nail art has been trending for years, and it’s not slowing down anytime soon. The reason? It’s versatile, chic, and can be customized in countless ways. From tiny daisies to bold roses, the possibilities are endless. Plus, it’s a great way to experiment with different colors and textures without committing to a permanent tattoo or expensive salon visit.
Another reason why it’s so popular is that it’s beginner-friendly. You don’t need expensive tools or advanced skills to create beautiful designs. All you need is a steady hand, a bit of patience, and the right techniques. And trust me, once you get the hang of it, you’ll be addicted!
Basic Tools You Need for Easy Flower Nail Art
Before you start, it’s important to have the right tools. Here’s a list of essentials you’ll need to create stunning flower nail art:
- Nail polish in various colors (choose shades that complement each other)
- A fine-tipped brush or dotting tool
- Topcoat and basecoat
- Cotton swabs and nail polish remover for mistakes
- A steady surface to work on
These tools are easy to find and affordable, making it accessible for anyone to try. Plus, they can be used for other nail art designs, so it’s a worthwhile investment.
Step-by-Step Guide to Creating Easy Flower Nail Art
Now that you have your tools ready, let’s dive into the step-by-step process of creating easy flower nail art. Follow these simple steps, and you’ll be amazed at how quickly you can achieve professional-looking results.
Step 1: Prep Your Nails
Start by cleaning your nails and applying a basecoat. This will help the polish adhere better and protect your nails from staining. Make sure your nails are smooth and free of any dirt or oil.
Step 2: Choose Your Base Color
Select a base color that will complement your flower design. Popular choices include white, pastel pink, or baby blue. Apply two coats of polish and let it dry completely before moving on to the next step.
Step 3: Create the Flower Centers
Using a dotting tool or the end of a brush, create small dots in the center of where you want your flowers to be. You can use a contrasting color to make the flowers pop.
Step 4: Add the Petals
Using a fine-tipped brush, paint the petals around the center dot. Start with one petal, then add more to create a full flower. You can vary the size and shape of the petals to add interest.
Step 5: Finish with a Topcoat
Once your flowers are complete, apply a topcoat to seal the design and add shine. This will also help your nail art last longer.
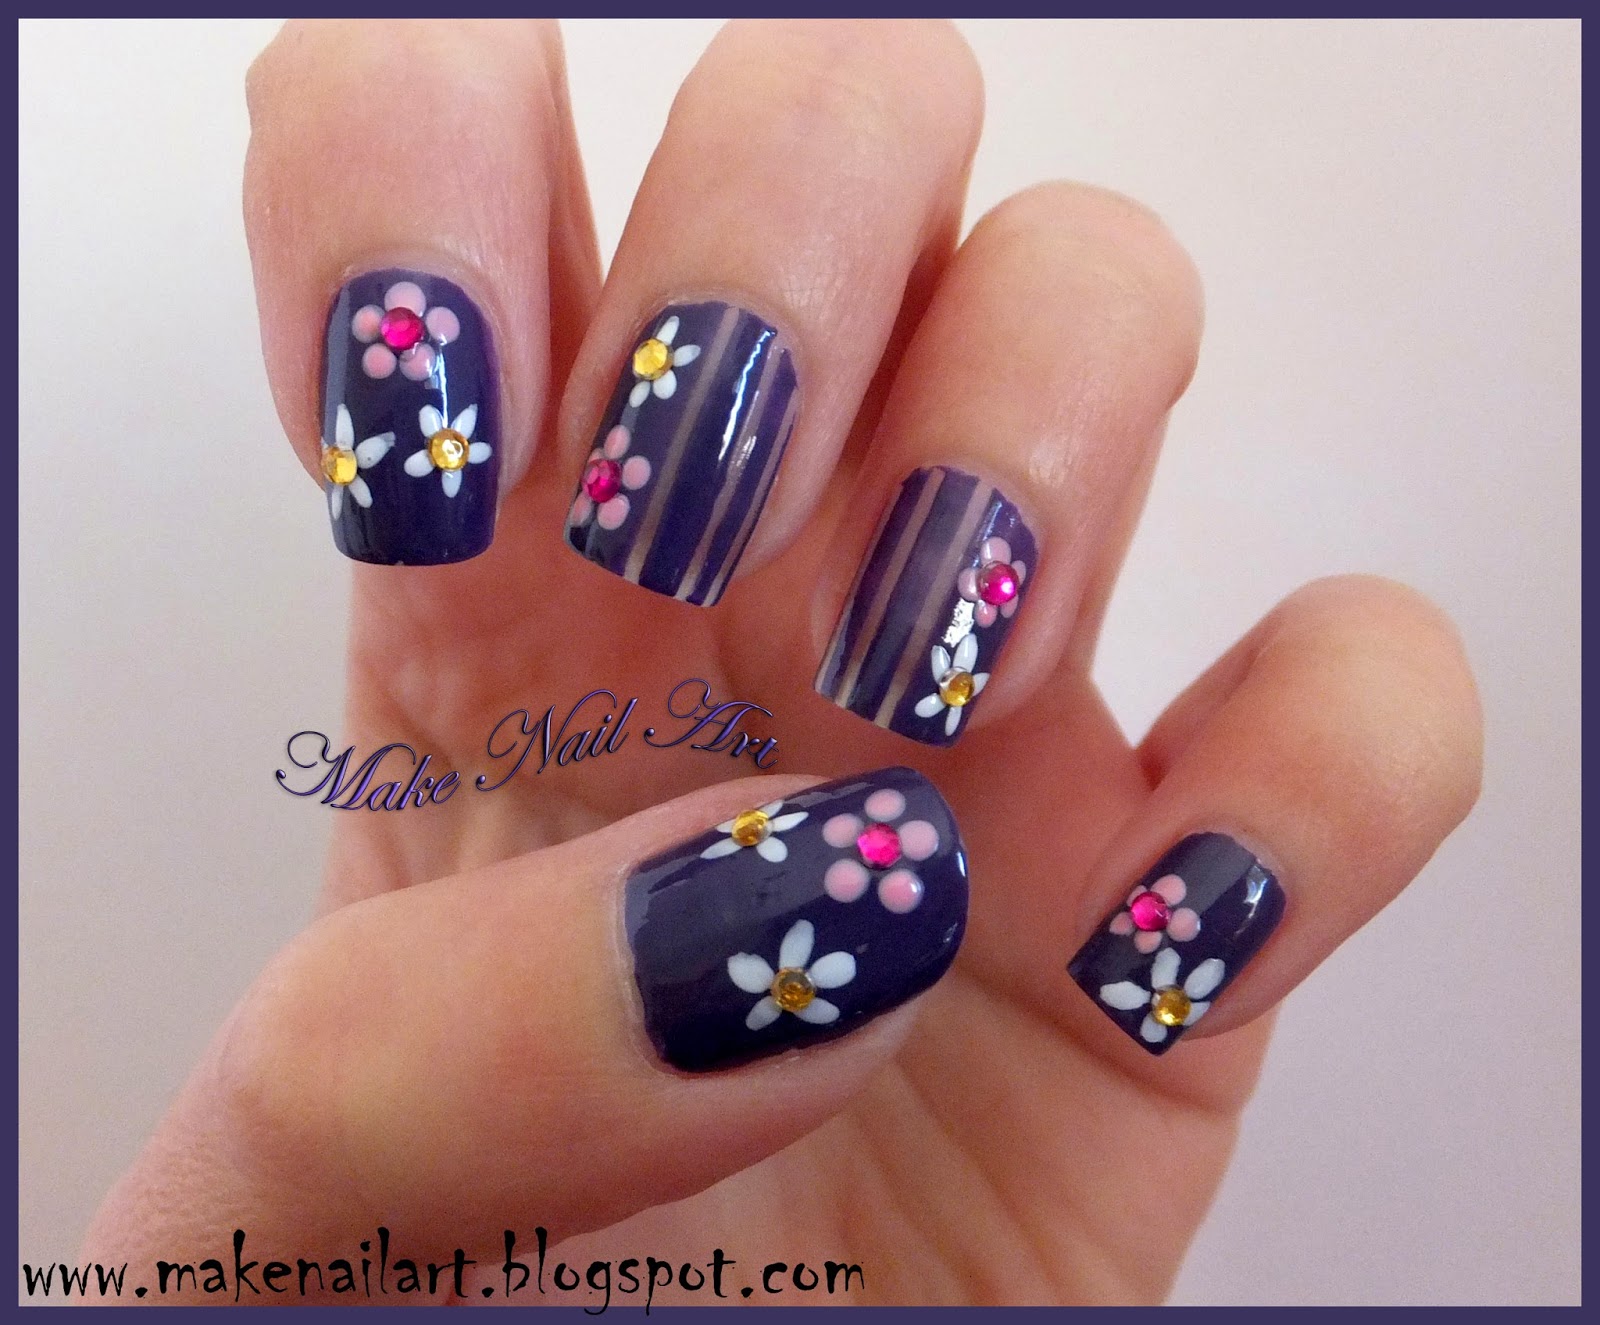
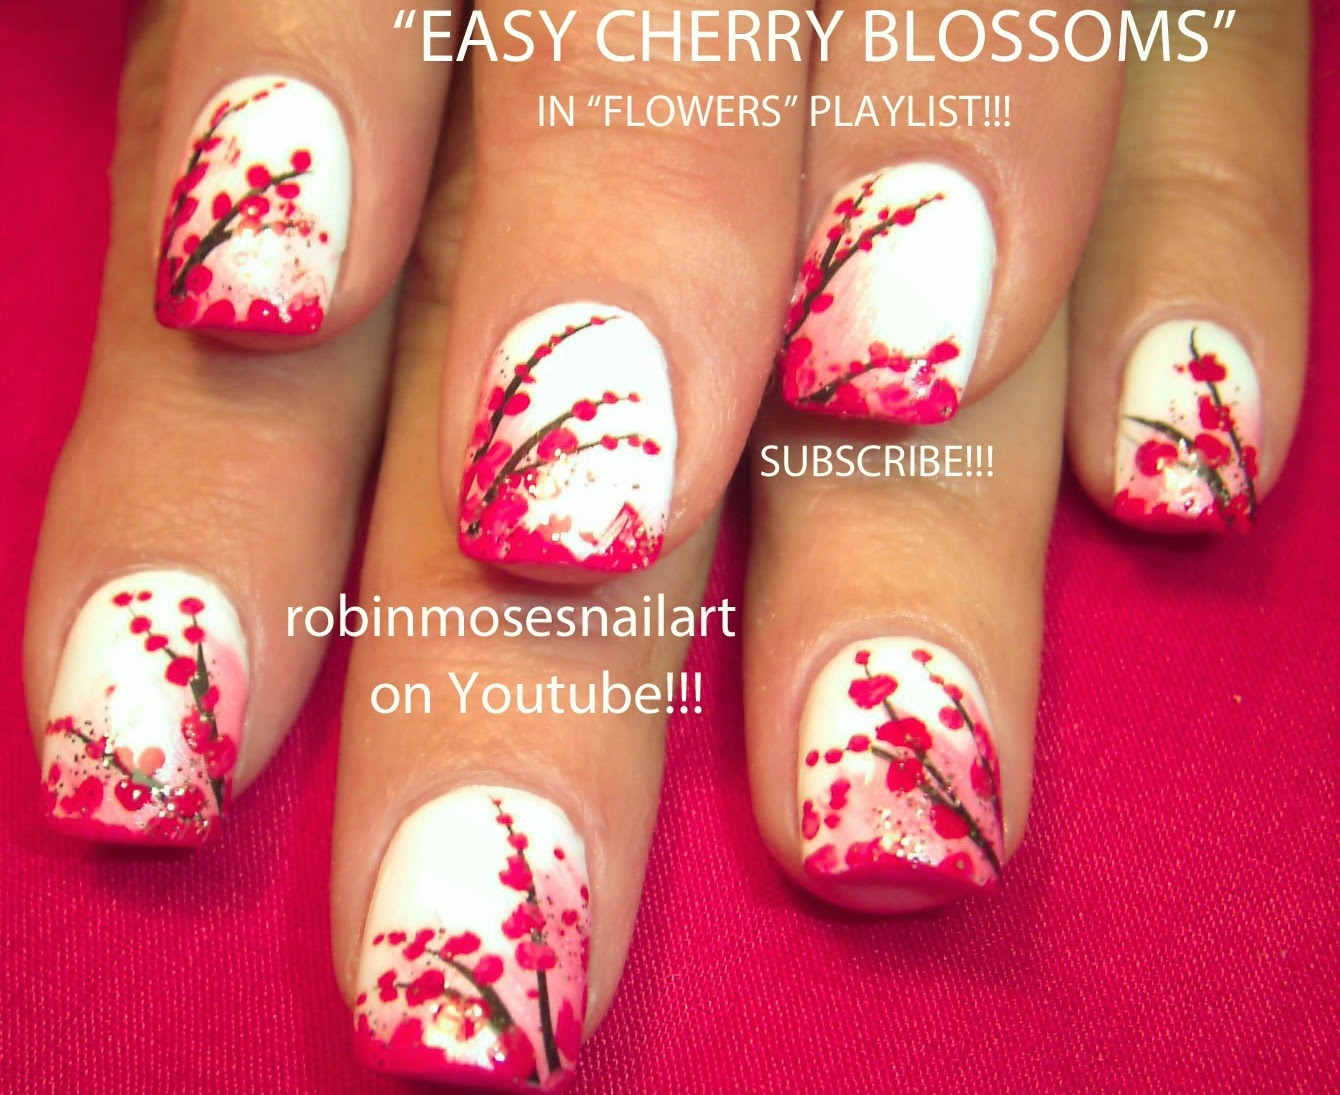
Variations of Easy Flower Nail Art
Once you’ve mastered the basic flower design, you can experiment with different variations to make your nails unique. Here are a few ideas to inspire you:
- Watercolor flowers for a soft, dreamy look
- Glitter accents to add sparkle and shine
- Ombre effects for a gradient flower design
- 3D flowers using nail art gels or textures
Don’t be afraid to mix and match these ideas to create your own signature style. The beauty of nail art is that there are no rules, so let your imagination run wild!
Tips for Perfecting Your Easy Flower Nail Art
Even the simplest designs can look messy if you don’t follow a few basic tips. Here are some pro tips to help you achieve flawless results:
- Work in a well-lit area to ensure precision
- Practice on a piece of paper before applying to your nails
- Use a magnifying mirror for detailed work
- Take breaks between coats to avoid smudging
These tips may seem obvious, but they can make a huge difference in the final outcome of your nail art. Remember, practice makes perfect, so don’t get discouraged if your first attempts aren’t flawless.
Common Mistakes to Avoid
While easy flower nail art is beginner-friendly, there are still a few common mistakes that can ruin your design. Here are some pitfalls to watch out for:
- Using too much polish, which can cause smudging
- Not letting each layer dry completely
- Choosing colors that don’t complement each other
- Rushing through the process
By avoiding these mistakes, you’ll be able to create designs that look polished and professional. Take your time, and don’t be afraid to start over if something doesn’t turn out right.
How to Maintain Your Easy Flower Nail Art
Once you’ve created your masterpiece, you’ll want to keep it looking fresh for as long as possible. Here are some tips for maintaining your easy flower nail art:
- Apply a fresh topcoat every few days
- Avoid using harsh chemicals that can damage the polish
- Wear gloves when doing household chores
- Keep your nails moisturized to prevent chipping
With proper care, your nail art can last for up to a week or more. Just remember to remove it gently when it’s time for a new design.
Inspiration from Professionals
If you’re looking for inspiration, check out what professional nail artists are doing. Social media platforms like Instagram and Pinterest are filled with stunning examples of easy flower nail art. Follow your favorite nail artists to stay updated on the latest trends and techniques.
Some popular nail artists to follow include:
- Nail Art by Jenny
- The Nail Social
- Nail Art Queen
These artists not only share beautiful designs but also offer tutorials and tips that can help you improve your skills.
Conclusion: Ready to Bloom?
And there you have it, folks! Easy flower nail art is not only fun but also a great way to express your creativity. With a few basic tools and some practice, you can create designs that rival those of professional nail artists. Remember to take your time, experiment with different styles, and most importantly, have fun!
So, what are you waiting for? Grab your nail polish and start creating your own floral masterpieces. Don’t forget to share your designs with us in the comments below or on social media. We’d love to see what you come up with!
Table of Contents
Why Easy Flower Nail Art is Trending
Basic Tools You Need for Easy Flower Nail Art
Step-by-Step Guide to Creating Easy Flower Nail Art
Variations of Easy Flower Nail Art
Tips for Perfecting Your Easy Flower Nail Art
How to Maintain Your Easy Flower Nail Art