Let’s face it, ladies and gents—brows are the ultimate game-changers when it comes to your look. But who has time to visit a salon every few weeks? Enter brow tinting at home, the holy grail of DIY beauty tricks that lets you rock flawless brows without breaking the bank or wasting hours commuting. If you’re tired of the “just woke up” brow look, this is your chance to level up your game. Buckle up because we’re diving deep into everything you need to know about transforming your brows from drab to fab right in the comfort of your living room.
So, why are we talking about brow tinting at home? Well, it’s simple. Everyone loves convenience, and if you can save both time and money while still achieving that salon-quality finish, why wouldn’t you? Plus, who doesn’t love the idea of being your own personal brow guru? We’re here to show you how it’s done, step by step, without any fancy jargon or complicated procedures.
But hold up—before you grab your tweezers and jump straight into the process, there are a few things you need to know. From choosing the right products to mastering the technique, we’ve got all the answers. So, whether you’re a total beginner or a seasoned pro looking for a refresher, this guide is your ultimate companion. Let’s get started!
What is Brow Tinting at Home?
First things first, let’s break it down. Brow tinting at home is exactly what it sounds like—giving your eyebrows a little color boost from the comfort of your own space. No need to deal with crowded salons or overpriced treatments. With the right tools and a bit of practice, you can achieve that polished, put-together look without leaving the house.
Now, here’s the kicker: tinting your brows isn’t just about adding color. It’s about enhancing your natural features and giving them that “wow” factor. Think of it as a non-permanent way to fill in sparse areas, define your arches, and create the illusion of fuller, more defined brows. And the best part? It lasts for weeks, so you won’t have to worry about touch-ups every single day.
Why Choose Brow Tinting at Home?
Let’s be real—salon visits can be expensive, especially if you’re a regular customer. But here’s the thing: you don’t have to sacrifice quality just because you’re doing it yourself. Brow tinting at home offers a ton of benefits, from saving money to customizing the process to suit your unique needs. Plus, who doesn’t love the idea of being self-reliant?
Here’s a quick rundown of why you should consider giving it a shot:
- Cost-Effective: Salon visits can easily rack up hundreds of dollars over time. With DIY brow tinting, you only need to invest in a few quality products, and you’re good to go for multiple sessions.
- Convenient: No more scheduling appointments or dealing with traffic. You can tint your brows whenever it suits you, whether it’s early morning or late at night.
- Customizable: You get to choose the shade, technique, and intensity. It’s all about what works best for you.
Tools You’ll Need for Brow Tinting at Home
Alright, so you’re ready to take the plunge. But before you start, you’ll need the right tools. Here’s a quick list of everything you’ll need to get the job done:
Essential Tools
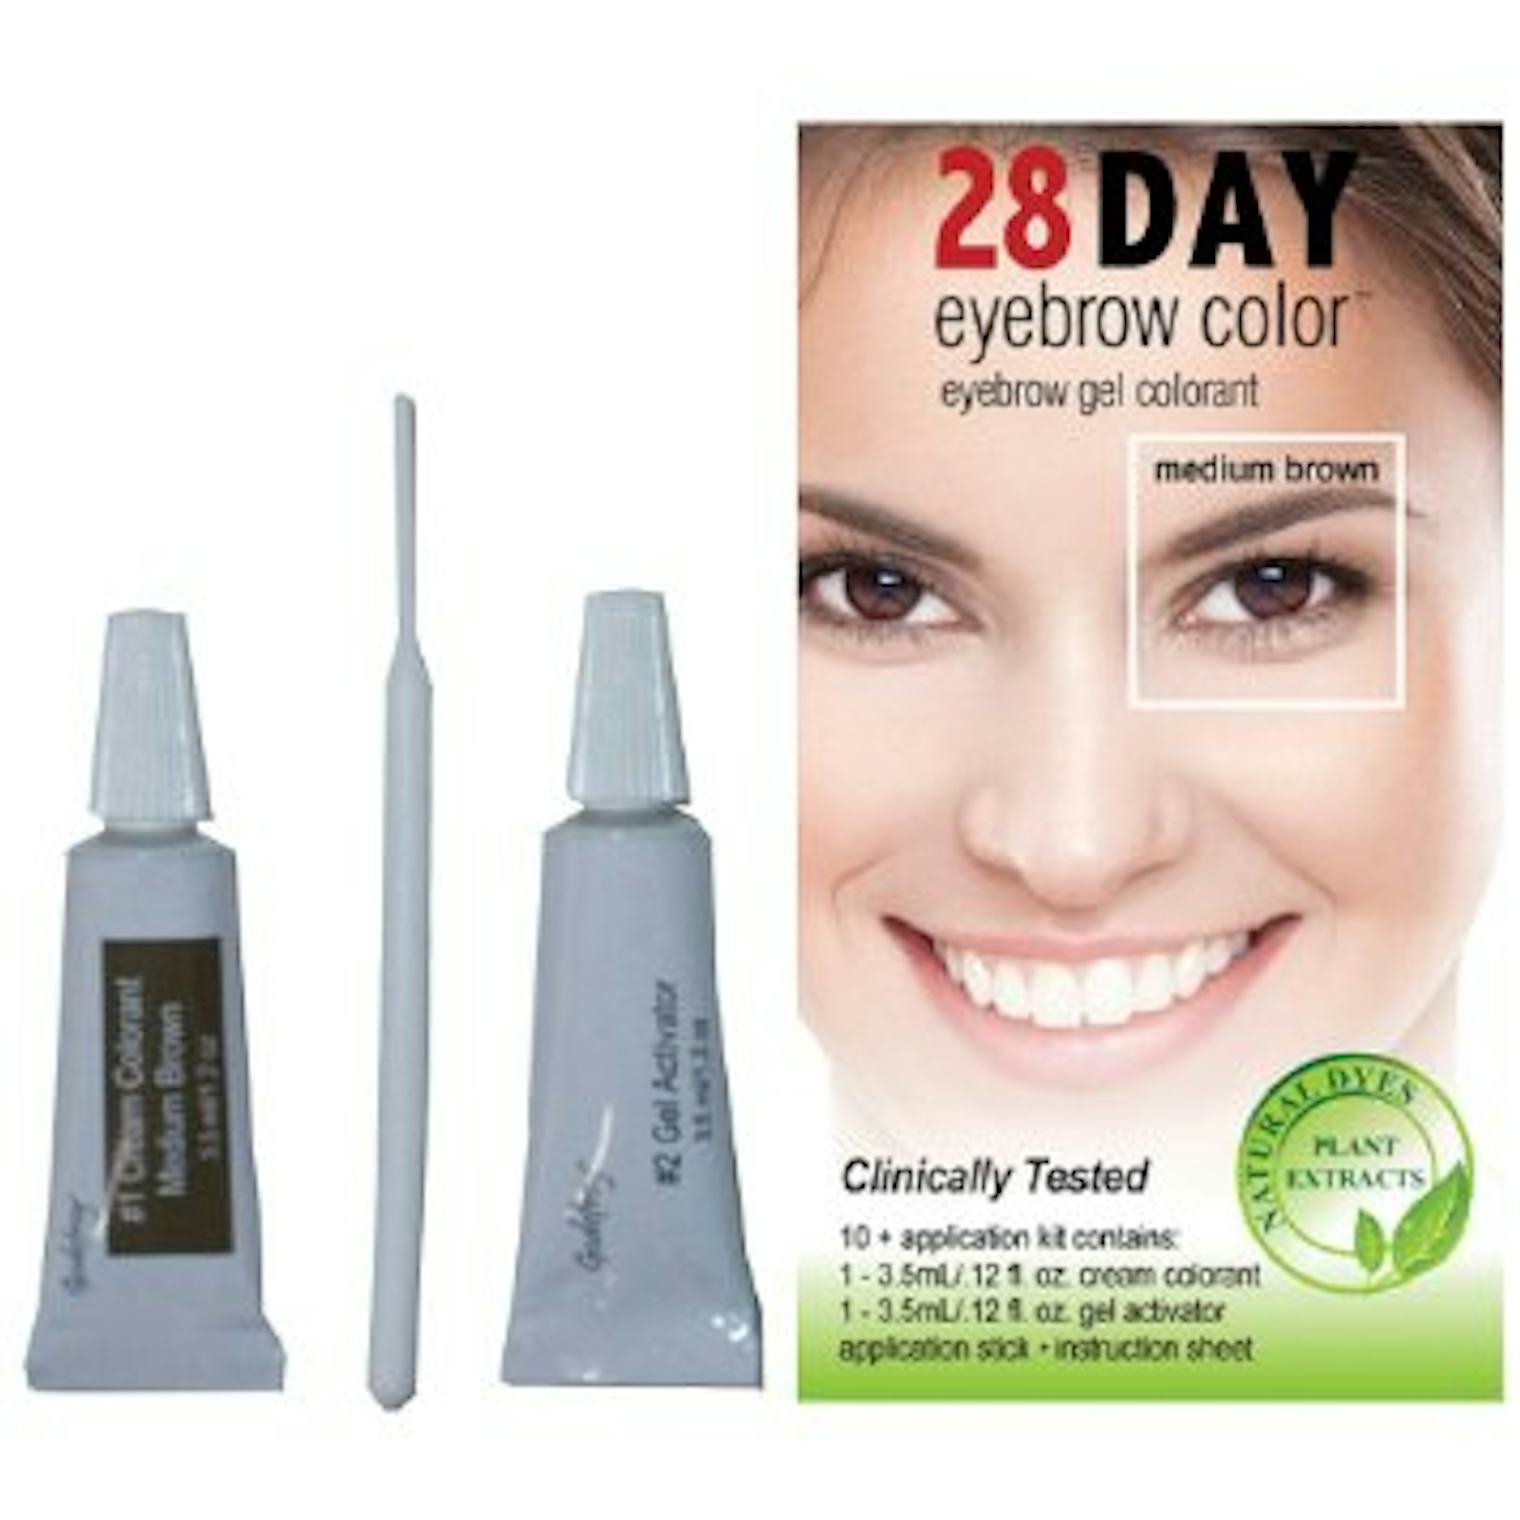
- Brow Tint Kit: This is your main weapon in the battle for perfect brows. Look for a kit that includes developer cream, tint solution, applicator brushes, and protective cream.
- Cotton Pads: You’ll need these to clean up any mistakes or excess product around your brows.
- Q-Tips: These are perfect for precision cleaning and touch-ups.
- Towel: Place a towel under your face to catch any drips or spills.
Now, here’s the deal: not all kits are created equal. Make sure you choose one that suits your skin type and hair color. If you’re unsure, do a patch test first to avoid any allergic reactions. Trust me, you don’t want to deal with a swollen face after trying to look glamorous!
Step-by-Step Guide to Brow Tinting at Home
Ready to roll up your sleeves and get to work? Here’s a step-by-step guide to help you achieve professional results from the comfort of your couch.
Step 1: Prep Your Workspace
Before you start, make sure your workspace is clean and clutter-free. Gather all your tools and place them within easy reach. You don’t want to be scrambling for a cotton pad halfway through the process!
Step 2: Clean Your Brows
Cleanliness is next to godliness, especially when it comes to brow tinting. Use a gentle cleanser to remove any oils or makeup residue from your skin. This will ensure the tint adheres properly and lasts longer.
Step 3: Apply Protective Cream
Now, this is where things get serious. Use the protective cream from your kit to create a barrier around your brows. This will prevent the tint from staining your skin and ensure a clean, professional finish.
Step 4: Mix the Tint
Follow the instructions on your kit to mix the tint and developer cream. Make sure you mix it thoroughly but gently to avoid creating too much air bubbles.
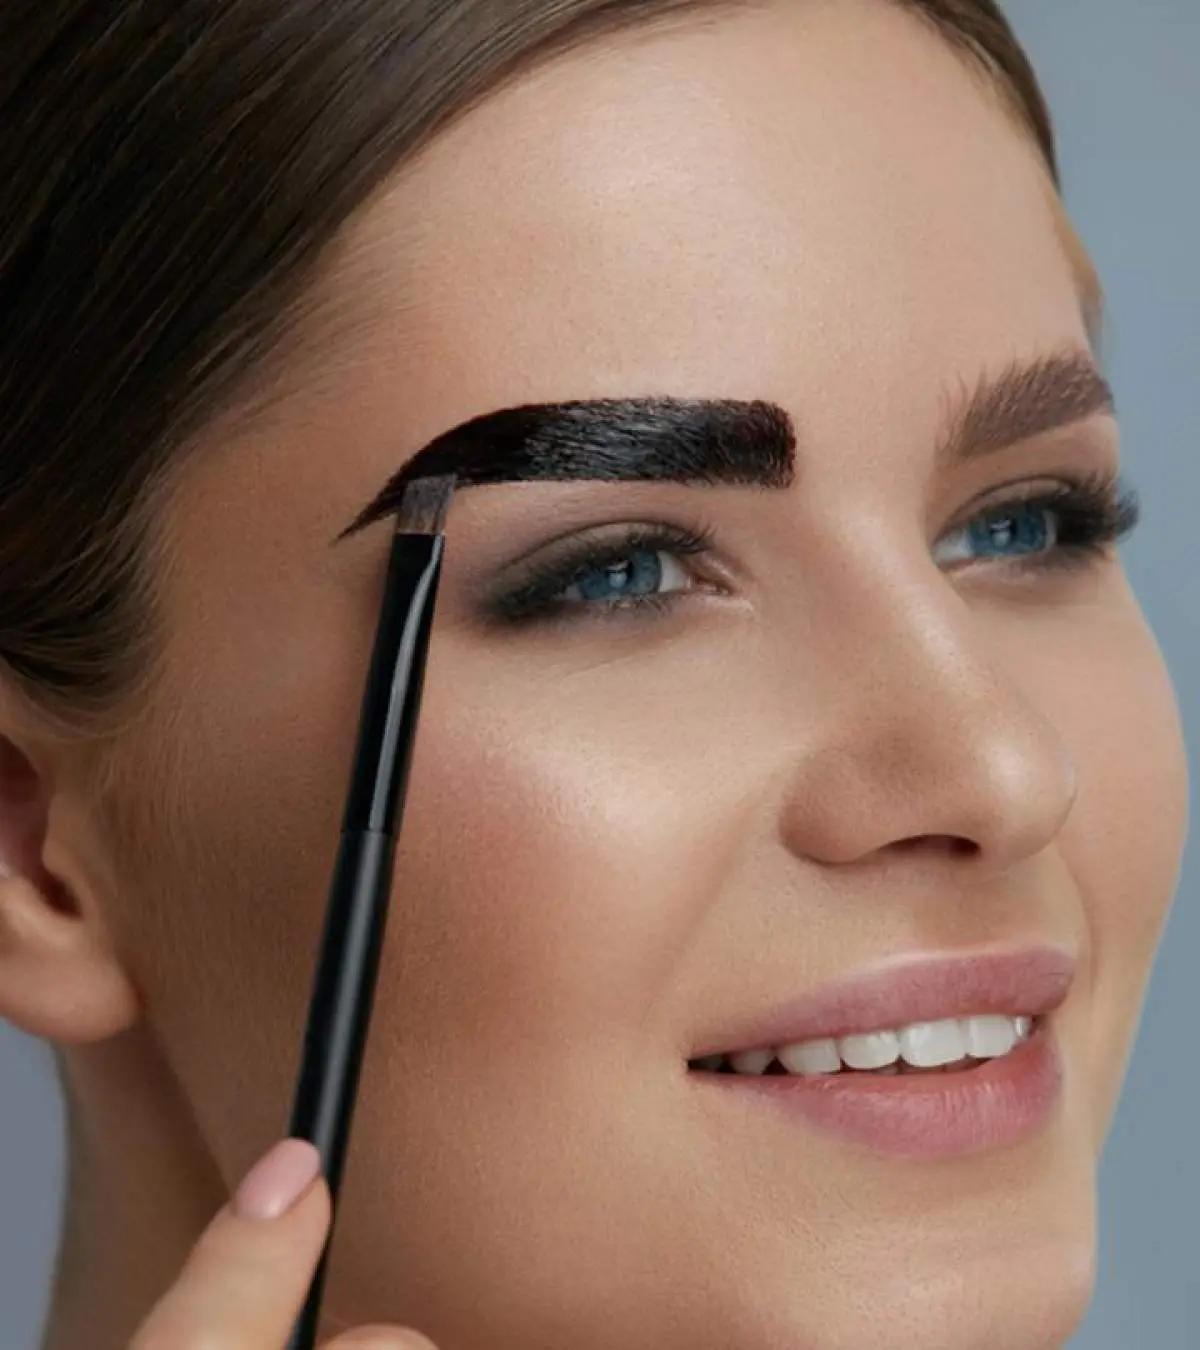
Step 5: Apply the Tint
Using the applicator brush, apply the tint evenly across your brows. Work in small sections to ensure even coverage. Don’t forget to comb through your brows with the brush to distribute the color evenly.
Step 6: Let It Set
Depending on the shade you’re aiming for, let the tint sit for 10-20 minutes. The longer it sits, the darker the color will be. So, if you’re going for a subtle look, keep an eye on the clock!
Step 7: Rinse and Reveal
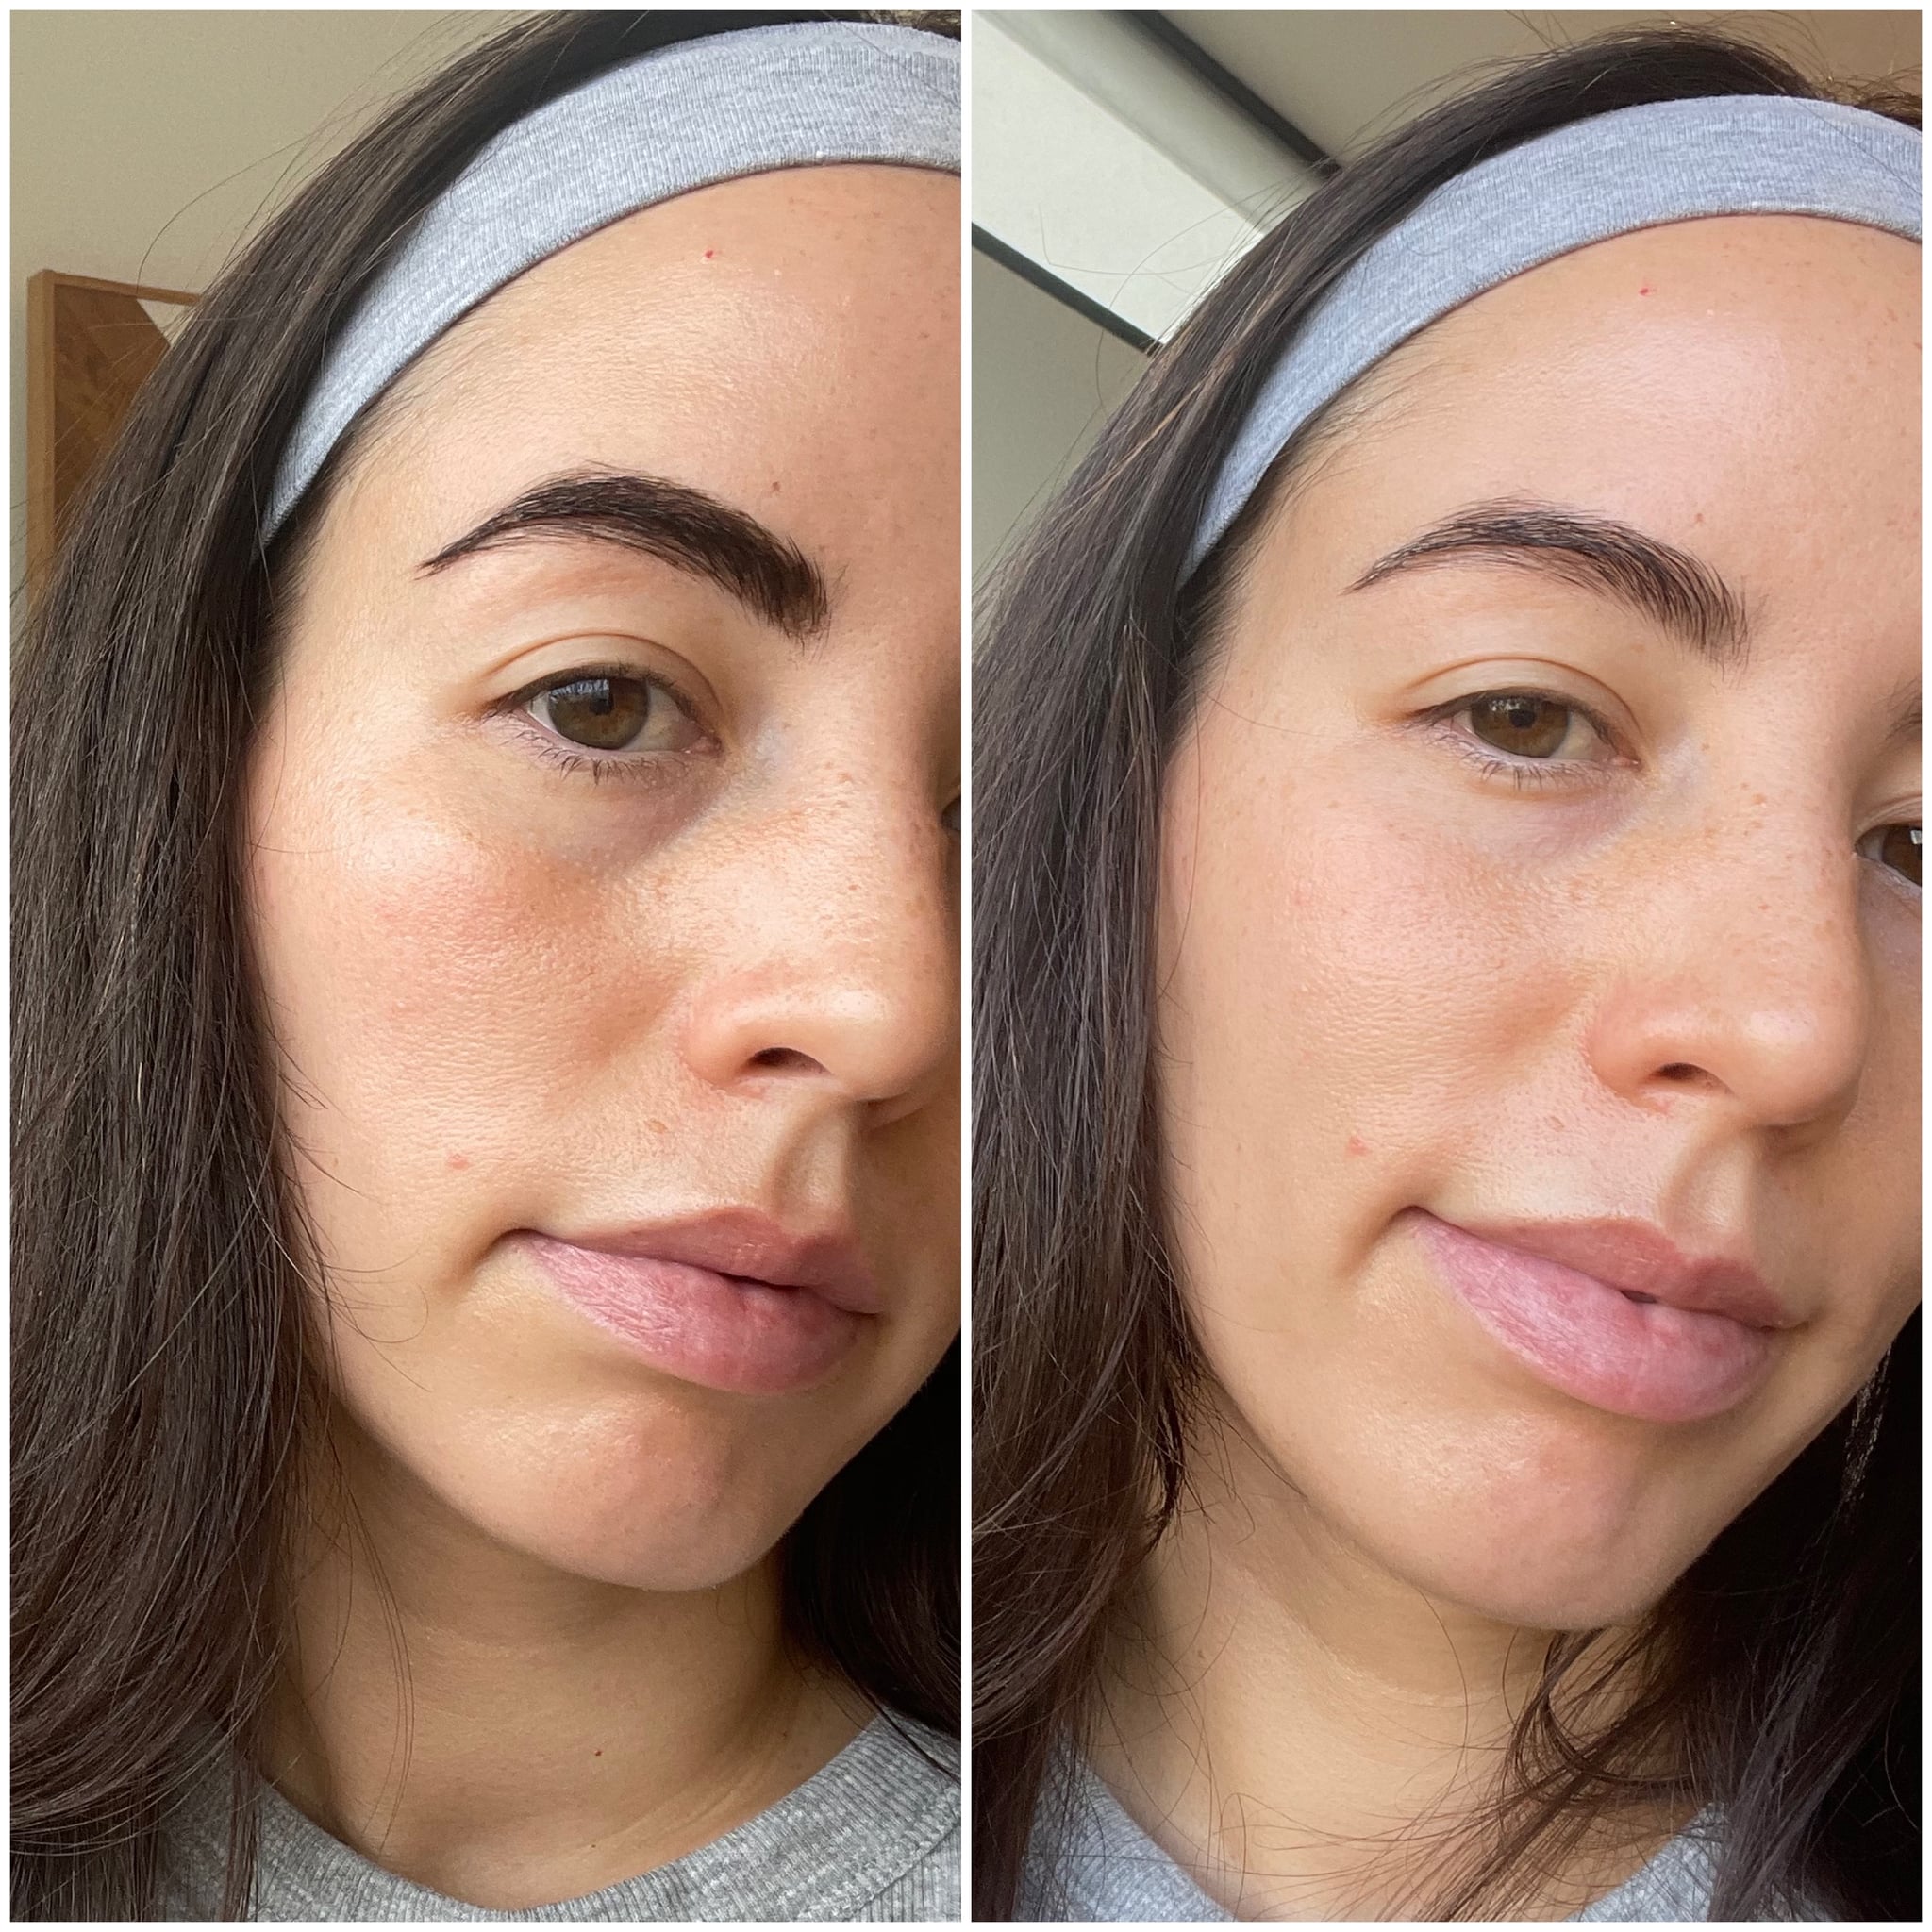
Once the time is up, gently rinse off the tint with lukewarm water. Use a cotton pad to wipe away any excess product. Voila! You now have perfectly tinted brows that’ll make people wonder if you’ve been hiding a secret weapon in your makeup bag.
Tips and Tricks for Perfect Brows
Now that you’ve got the basics down, here are a few tips and tricks to help you take your brow game to the next level:
- Less is More: Start with a lighter shade and build up gradually. You can always add more, but it’s harder to take it away.
- Use a Timer: Don’t rely on your memory to keep track of time. Set a timer to ensure you don’t leave the tint on for too long.
- Moisturize After: Once you’ve rinsed off the tint, apply a light moisturizer to keep your skin hydrated and prevent dryness.
Common Mistakes to Avoid
As with any DIY beauty treatment, there are a few common mistakes to watch out for. Here’s what you need to avoid:
Mistake 1: Over-Tinting
It’s tempting to go all out, but trust me, over-tinting is a recipe for disaster. Stick to a natural shade that complements your hair color and skin tone.
Mistake 2: Skipping the Patch Test
Never skip the patch test! Even if you’ve used a product before, it’s always a good idea to test it on a small area of your skin first.
Mistake 3: Rushing the Process
Rushing can lead to uneven application and messy results. Take your time and follow each step carefully for the best outcome.
How Long Does Brow Tint Last?
One of the biggest questions people have is how long the results will last. The good news is that brow tinting can last anywhere from 4 to 6 weeks, depending on your hair growth cycle and how often you exfoliate your skin. Just remember, the color will gradually fade over time, so be prepared for a touch-up session every few weeks.
Expert Tips for Maintaining Your Tinted Brows
Maintaining your tinted brows is just as important as the initial application. Here are a few expert tips to help you keep them looking fresh:
- Avoid Harsh Products: Stay away from harsh cleansers or exfoliants that can strip away the tint.
- Use a Brow Serum: A good brow serum can help promote healthy hair growth and keep your brows looking lush.
- Touch Up as Needed: If you notice any fading, don’t hesitate to do a touch-up session. Just make sure to patch test first!
Sources and References
When it comes to brow tinting at home, it’s important to rely on trusted sources for information. Here are a few references that have helped shape this guide:
- Allure: A go-to resource for all things beauty and skincare.
- Cosmopolitan: Offers a wealth of tips and tricks for DIY beauty treatments.
- Byrdie: Known for its in-depth reviews and expert advice on beauty products.
Conclusion
So, there you have it—everything you need to know about brow tinting at home. From choosing the right tools to mastering the technique, this guide has got you covered. Remember, practice makes perfect, so don’t be afraid to experiment and find what works best for you.
And hey, if you’ve found this article helpful, don’t forget to leave a comment or share it with your friends. Who knows? You might just inspire someone else to take the leap and transform their brows from drab to fab. Until next time, happy tinting!
Table of Contents
- What is Brow Tinting at Home?
- Why Choose Brow Tinting at Home?
- Tools You’ll Need for Brow Tinting at Home
- Step-by-Step Guide to Brow Tinting at Home
- Tips and Tricks for Perfect Brows
- Common Mistakes to Avoid
- How Long Does Brow Tint Last?
- Expert Tips for Maintaining Your Tinted Brows
- Sources and References
- Conclusion
- Chicagoland Soccer Twitter
- Father V Twitter
- Celebrity Birthdays September 19
- Eric Conn X
- Dfinity Twitter