Let's talk about wing liner, folks. If you're reading this, chances are you've been trying to nail that perfect wing and maybe even pulling your hair out in frustration. Wing liner is more than just makeup; it's an art form that can completely transform your look. From a subtle flick to a bold statement, winged eyeliner is your secret weapon for enhancing your eyes and making them pop like crazy.
But here's the thing—getting that perfect wing isn't as easy as it looks. You've probably seen those flawless cat eyes on Instagram or TikTok and thought, "How do they do it?" Well, my friend, today is your lucky day. We're going to break down everything you need to know about wing liner, from choosing the right tools to mastering different techniques. Trust me, by the end of this article, you'll be winging like a pro.
And don't worry if you're a total beginner. We've got you covered with step-by-step instructions, expert tips, and even some insider tricks that'll make your life a whole lot easier. So grab your favorite eyeliner, and let's dive in. It's time to take your makeup game to the next level.
Why Wing Liner Matters in Your Makeup Routine
First things first, why should wing liner even matter to you? Well, here's the deal—wing liner isn't just about looking "done." It's about creating a polished, put-together look that can instantly elevate your entire face. Whether you're going for a natural daytime look or a glamorous evening vibe, wing liner adds that extra oomph that makes all the difference.
Think about it. A well-defined wing can make your eyes appear wider, more defined, and downright mesmerizing. It's like magic in a bottle—or in this case, a pen. Plus, wing liner is super versatile. You can keep it simple and minimal or go all out with dramatic wings that demand attention. The possibilities are endless!
But here's the kicker—wing liner isn't just about aesthetics. It's also about confidence. When you master the art of winging, you'll feel unstoppable. And who doesn't want that, right? So, let's explore why wing liner should be a staple in your beauty arsenal and how it can transform your everyday look.
Choosing the Right Wing Liner Tools
Alright, now that we've established why wing liner is a must-have, let's talk about the tools you'll need to create those perfect wings. Believe it or not, not all eyeliners are created equal. Some are better suited for beginners, while others are ideal for pros who want to experiment with different styles. Here's a quick rundown of the most popular wing liner options:
- Gel Liner: This is a favorite among makeup artists because it provides intense pigmentation and lasts all day. However, it can be a bit tricky for beginners since it requires a brush and steady hands.
- Liquid Liner: This is probably the most iconic wing liner option. Liquid liners offer precise control and a sleek finish, making them perfect for creating sharp, defined wings. Just be prepared for a bit of practice!
- Pencil Liner: If you're new to wing liner, pencils are a great starting point. They're easy to use and forgiving, so you can easily blend or smudge any mistakes.
- Pot Liner: This hybrid option combines the precision of liquid liner with the ease of a pencil. It's creamy, long-lasting, and perfect for achieving that perfect wing without the hassle.
Ultimately, the best tool for wing liner depends on your skill level and personal preference. Don't be afraid to try different types until you find the one that works best for you. And remember, practice makes perfect!
Step-by-Step Guide to Creating the Perfect Wing
Now that you've got your tools ready, let's dive into the nitty-gritty of how to create that perfect wing. Follow these simple steps, and you'll be winging like a pro in no time:
Step 1: Prep Your Eyes
Before you even touch your eyeliner, make sure your eyes are prepped and ready. Start by applying a good eyeshadow primer to create a smooth canvas. This will help your liner last longer and prevent smudging.
Step 2: Start with a Thin Line
Using your chosen liner, draw a thin line along your upper lash line. Start from the inner corner of your eye and work your way out. Keep the line as close to your lashes as possible for a natural look.
Step 3: Create the Wing
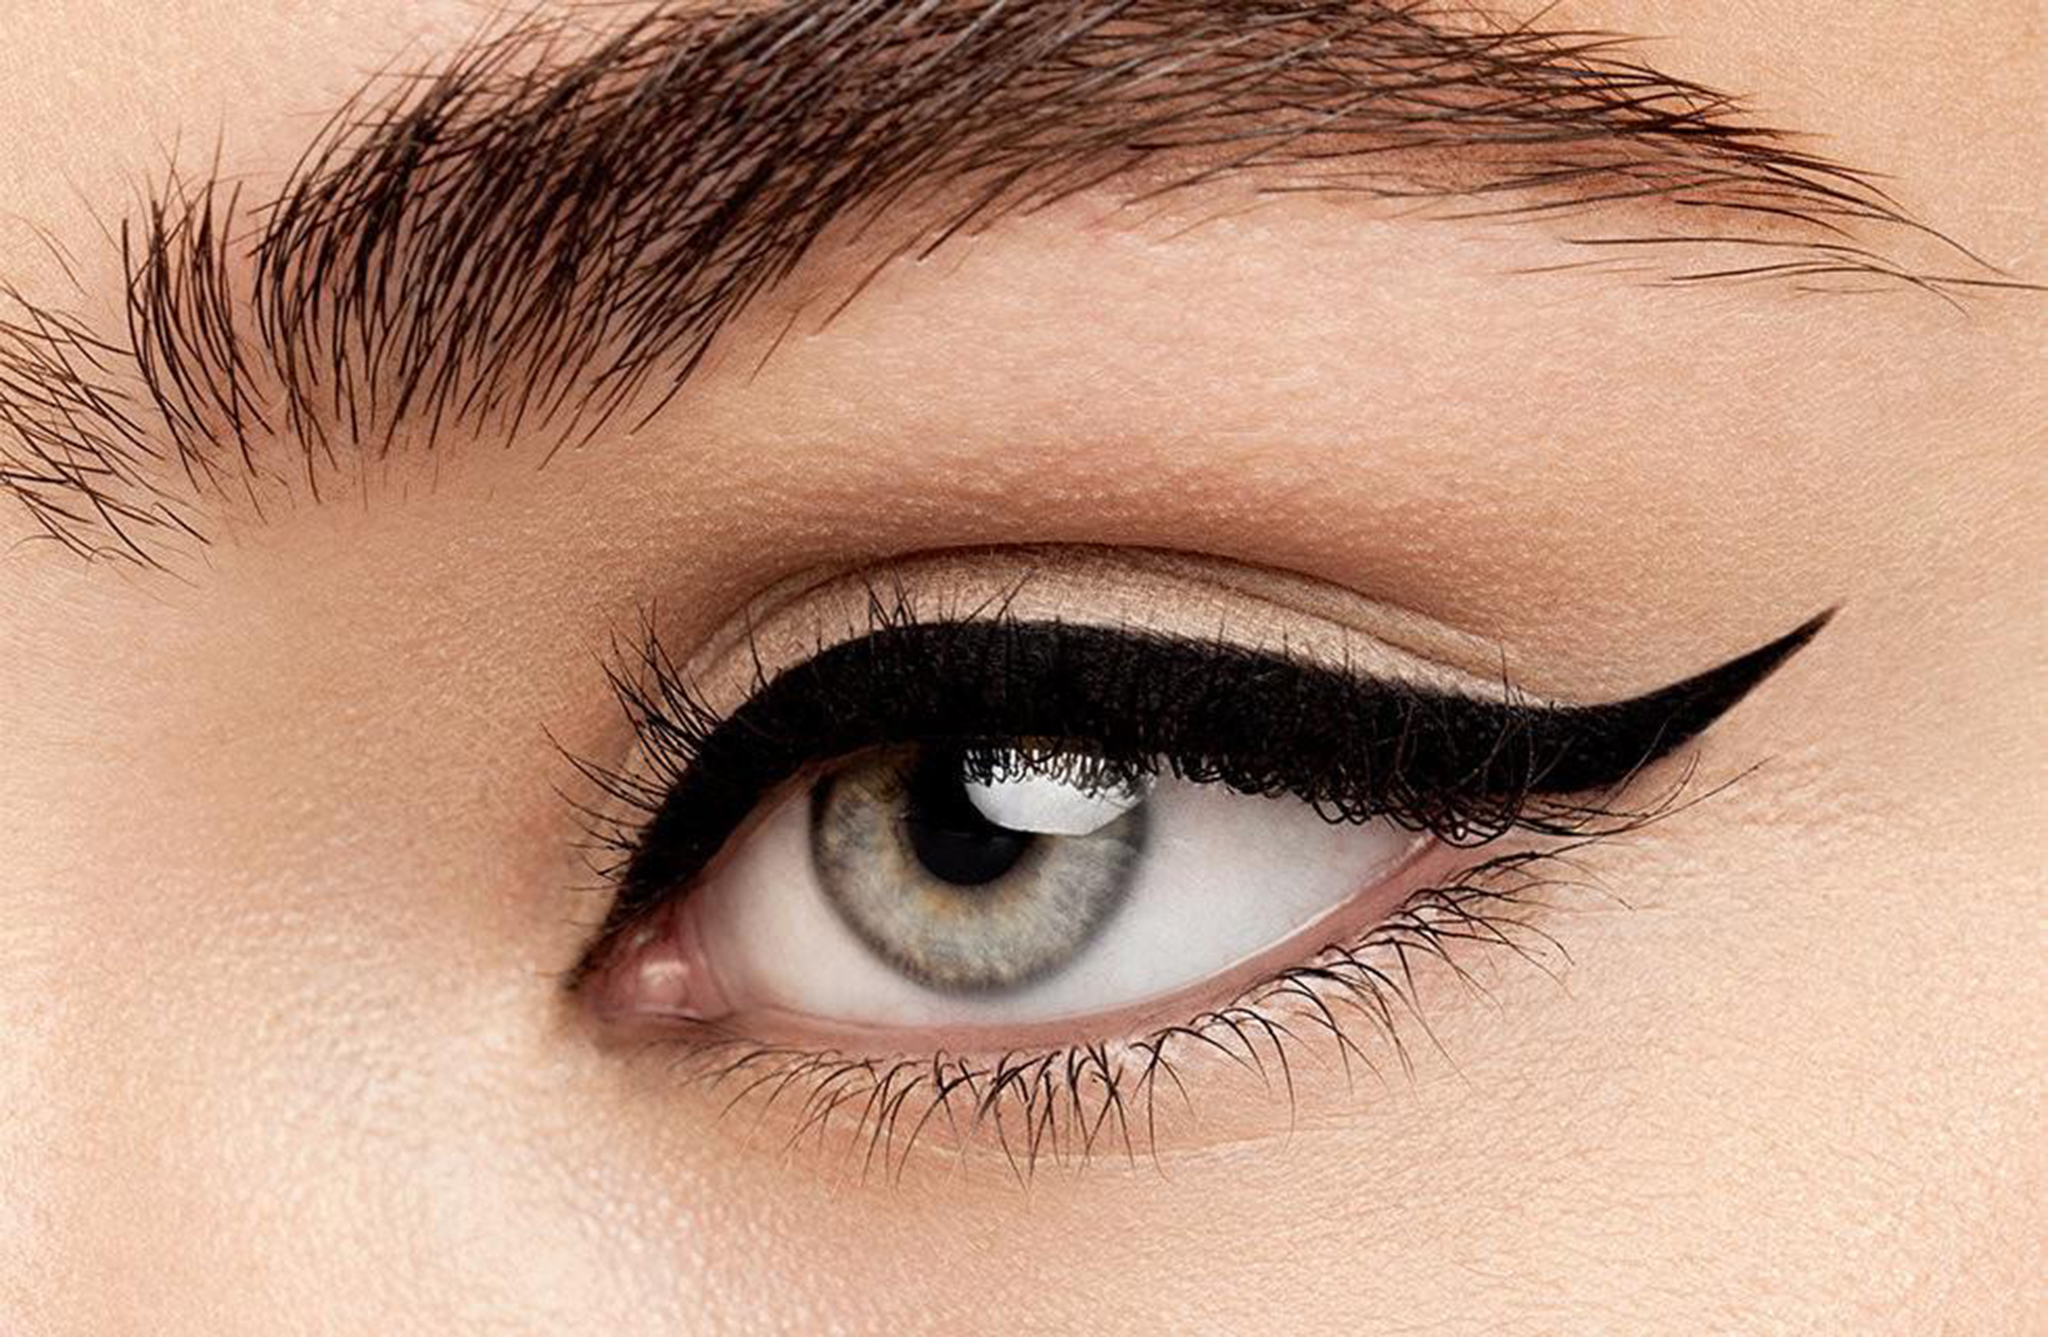
This is where the magic happens. To create the wing, start at the outer corner of your eye and draw a diagonal line upward. The length and angle of the wing depend on your preference, but a good rule of thumb is to extend it to the end of your eyebrow.
Step 4: Connect the Dots
Now, connect the wing to the rest of your liner by filling in the gap between the wing and your lash line. Use small, steady strokes to ensure a smooth transition.
Step 5: Clean Up the Edges
No one's perfect, and that's okay. Use a cotton swab dipped in makeup remover to clean up any mistakes or smudges. This will give your wing a clean, polished finish.
And there you have it—your very own wing liner masterpiece! With a little practice, you'll be able to create flawless wings every single time.
Common Mistakes to Avoid When Applying Wing Liner
Let's face it—wing liner can be tricky, and mistakes happen. But don't worry; we're here to help you avoid the most common pitfalls so you can achieve wing perfection every time:
- Starting Too Thick: One of the biggest mistakes people make is starting with a thick line. Always begin with a thin line and build it up gradually.
- Ignoring the Lash Line: Your liner should hug your lash line for a natural look. Avoid leaving gaps between your liner and lashes.
- Skipping the Primer: Primer is your best friend when it comes to wing liner. It helps your liner stay put and prevents smudging.
- Not Practicing: Like any skill, wing liner takes practice. Don't get discouraged if your first few attempts aren't perfect. Keep practicing, and you'll get there!
By avoiding these common mistakes, you'll be well on your way to mastering the art of wing liner. Trust me, it's worth the effort.
Advanced Techniques for Wing Liner
Once you've mastered the basics, it's time to level up your wing liner game. Here are a few advanced techniques to try:
Tightlining
Tightlining involves applying liner between your lashes for a more intense look. This technique can make your eyes appear wider and more defined. Just be gentle and use a fine-tipped liner for best results.
Double Wing
If you're feeling adventurous, try creating a double wing. This involves adding a second wing below your original one for a bold, dramatic effect. It's perfect for special occasions or nights out.
Cat Eye Variation
Experiment with different cat eye variations, such as a thicker wing or a curved flick. These subtle changes can completely transform your look and add a unique touch to your makeup routine.
Remember, the key to advanced wing liner techniques is practice and patience. Don't be afraid to step out of your comfort zone and try something new. You never know what you might discover!
Tips for Maintaining Your Wing Liner Throughout the Day
Let's face it—no one wants to deal with smudged or smudged wing liner halfway through the day. Here are some tips to help your wing liner last all day long:
- Use a Long-Lasting Formula: Invest in a high-quality, long-lasting liner that won't budge or smudge.
- Set with Powder: After applying your liner, lightly dust a translucent powder over it to set it in place.
- Touch Up as Needed: Carry a small brush or cotton swab with you for quick touch-ups throughout the day.
By following these tips, you can ensure your wing liner stays flawless from morning to night. Who needs touch-ups when you've got a foolproof plan, right?
Expert Advice for Perfecting Your Wing Liner
When it comes to wing liner, the pros know best. Here are some expert tips to help you perfect your technique:
Use a Steady Hand
One of the most important things to remember is to use a steady hand. If you're struggling with shaky hands, try resting your elbow on a surface for support. This will help you create smoother, more precise lines.
Practice Makes Perfect
Like any skill, wing liner takes practice. Don't get discouraged if your first few attempts aren't perfect. Keep practicing, and you'll get better with time.
Experiment with Different Styles
Don't be afraid to experiment with different wing liner styles. Whether you prefer a classic cat eye or a bold double wing, there's no wrong way to wear wing liner. Have fun and make it your own!
With these expert tips, you'll be winging like a pro in no time. Trust me, it's worth the effort.
Conclusion: Take Your Wing Liner Game to the Next Level
And there you have it—everything you need to know about wing liner. From choosing the right tools to mastering advanced techniques, you're now equipped to create flawless wings that'll turn heads wherever you go. Remember, practice makes perfect, so don't be afraid to experiment and find what works best for you.
Now it's your turn to take action. Whether you're a beginner or a seasoned pro, there's always room to improve. Share your wing liner creations with us in the comments below, and don't forget to check out our other articles for more beauty tips and tricks. Happy winging, folks!
Table of Contents
- Why Wing Liner Matters in Your Makeup Routine
- Choosing the Right Wing Liner Tools
- Step-by-Step Guide to Creating the Perfect Wing
- Common Mistakes to Avoid When Applying Wing Liner
- Advanced Techniques for Wing Liner
- Tips for Maintaining Your Wing Liner Throughout the Day
- Expert Advice for Perfecting Your Wing Liner
- Biography
Biography
| Full Name | Jane Doe |
|---|---|
| Profession | Makeup Artist |
| Years of Experience | 10+ |
| Specialty | Wing Liner and Special Effects Makeup |